Case Study - Automating Spently’s Review Pipeline
March 21, 2019
Disclosure: The events in this blog took place in 2018. I am no longer working at Spently.
The Shopify App Store
Most Shopify merchants discover new apps through the Shopify App Store.
In the App Store, you can search for applications by navigating through categories, collections or using search. At the time of writing this, apps can be sorted by Most Popular and Newest.
The number of reviews an app receives is essential to gaining traction in the Shopify App Store. The algorithm that determines the order in which to display apps to merchants takes reviews into consideration.
Shopify does not disclose exactly how this algorithm works, but it is clear that the more (positive) reviews you have, the more likely you are to appear on the first page results for a specific category, such as email marketing.
This leads to more visibility, as a merchant is more likely to discover your application if they do not have to navigate to the next page in their search results.
First Page = More Installs
One of the biggest challenges is getting merchants to try your application, so being on the first page of search results gives your app a big advantage.
Spently’s Review Pipeline
Since reviews are so essential to the organic growth of a Shopify app, Spently has built a process around asking for reviews, and automated this process as much as possible.
When a merchant has a positive support experience, Spently’s customer success team will ask that merchant for a review.
If the merchant is seeing positive results from using Spently, such as increased ROI, we would send them a message politely asking for a review.
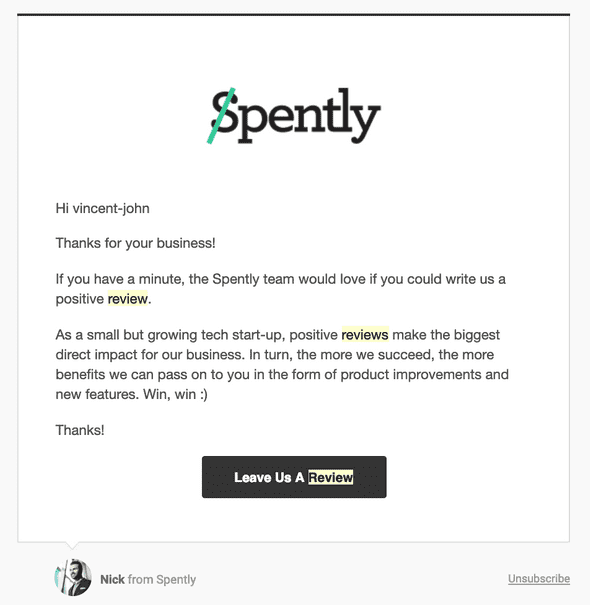
We also built a section into our application that links directly to the app’s Shopify review page.
Merchants are extremely busy people, and in order to respect their time, we wanted to ensure we were only asking for a review from users who had not yet reviewed.
Merchants can only review an app once, so it would be pointless, and likely annoying for the merchant, to ask for another review. We wanted to prevent this in order to offer a good user experience.
Automating the Review Pipeline
🚩 The first step in ensuring merchants were only asked to review once was adding a tag to each merchant in our customer messaging platform, Intercom, to mark them as a Reviewer.
📮 Next, we trained the staff to check for this tag before asking for a review, and we also modified all the automated messages involving reviews to only send to merchants without the Reviewer tag.
The Challenges
We faced two challenges when trying to implement the tag in Intercom:
- We already had over 200 reviews in the App Store, and none of those merchants were tagged in Intercom.
- New reviews were added daily, and we needed a way to add the Intercom tag to new reviewers.
The Approach
In order to overcome these challenges, I wrote a web crawler that had two main functionalities:
-
Performs an initial sync by scraping the review page, looping through each review, finding the associated merchant in our database, and then send an API call to Intercom to tag that merchant as a
Reviewer. -
Create a scheduled task which would run daily and check for any new reviews created that day, and add the ‘Reviewer’ tag to any merchant who had left a new review.
In this case study, I will be talking about how I tackled the first challenge.
Pagination
I needed to access all the reviews, however the review page of a Shopify App is paginated, and shows only about 10 reviews per page.
At the bottom of the page, there is a pagination component which displays the total number of review pages there are:

Here is the code for that component:
<div class="pagination">
	<span class="previous_page disabled">« Newer</span>
	<em class="current">1</em>
	<a rel="next" href="https://apps.shopify.com/spently?page=2#reviews">2</a>
	<a href="https://apps.shopify.com/spently?page=3#reviews">3</a>
	<a href="https://apps.shopify.com/spently?page=4#reviews">4</a>
	<a href="https://apps.shopify.com/spently?page=5#reviews">5</a>
	<a href="https://apps.shopify.com/spently?page=6#reviews">6</a>
	<a href="https://apps.shopify.com/spently?page=7#reviews">7</a>
	<a href="https://apps.shopify.com/spently?page=8#reviews">8</a>
	<a href="https://apps.shopify.com/spently?page=9#reviews">9</a>
	<span class="gap">…</span>
	<a href="https://apps.shopify.com/spently?page=19#reviews">19</a>
	<a href="https://apps.shopify.com/spently?page=20#reviews">20</a>
	<a class="next_page" rel="next" href="https://apps.shopify.com/spently?page=2#reviews">Older »</a>
</div>
I needed to scrape each of the review pages, until I got to the very last page.
To do that, I needed to know how many review pages there were in total, to tell the program how many pages it needed to crawl.
The pagination component is structured so the first link is “Newer” and the last link is “Older” (instead of a Previous and Next button).
The numbers in-between were the range of pages from the first page to the last one (containing the oldest reviews).
This meant that to access the value of the oldest page I would need to grab the second last link in the component. Once I had that value, I converted it to an integer.
Scraping
In order to achieve this, I used the Html Agility Pack library, which is an HTML parser written in csharp.
I wrote some logic to parse the Spently App Page, and access the pagination component like so:
HtmlAgilityPack.HtmlWeb web = new HtmlAgilityPack.HtmlWeb();
HtmlAgilityPack.HtmlDocument doc2 = web.Load(SpentlyAppUrl);
var reviewPage = doc2.DocumentNode;
string pageCount = reviewPage.SelectSingleNode("//div[@class='pagination']//a[last()-1]").InnerText;
int pages = Convert.ToInt32(pageCount);
I initialized an empty list of reviews to a variable called reviews, which would be used to capture the 10 reviews from each page that was scraped.
Next I initialized the following for loop:
for (int pageNum = 1; pageNum < pages; pageNum++)`The loop would increment pageNum by 1 until the pageNum value was greater than the total number of review pages.
For the first page, I already had the HTML document loaded and therefore did not need to load it again.
Instead, I could just use XPATH to select the div containing all 10 reviews, and pass them to a method called GetReviewsFromNodes.
The GetReviewsFromNodes method is responsible for looping through each of the 10 reviews, grabbing the necessary information, serializing the data to a review object, and returning a list of reviews from that page. Those reviews are added to the review list, and then the for loop performs another iteration.
For all the other iterations of the loop, we must load a new HTML document to access the other review pages (for example https://apps.shopify.com/spently?page=19). Each page’s HTML content is passed to the method GetReviewsFromNode which returns another 10 review objects which are then added to the review list.
Once we have looped through all the pages, we have a giant list of all the reviews which we can then use to update Intercom.
Extracting Single Review Information
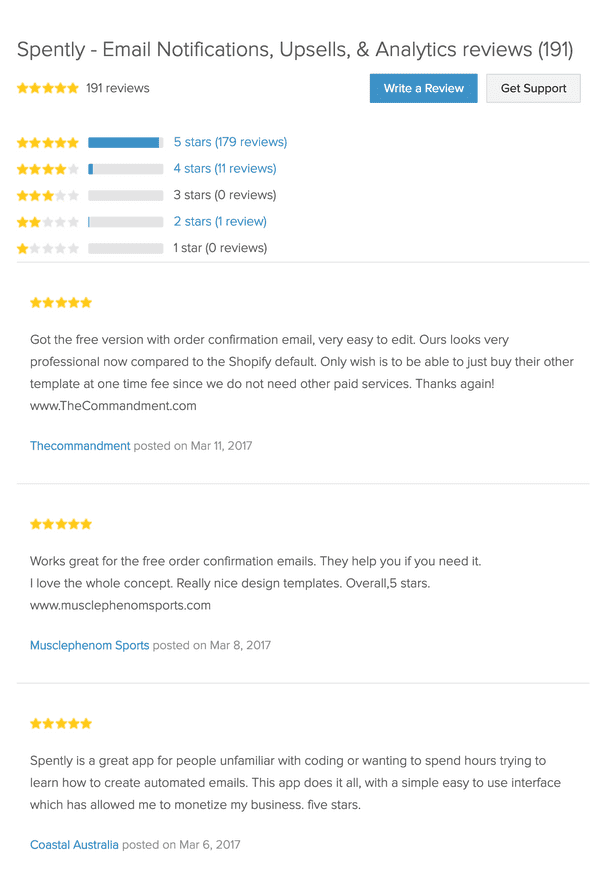
In the old App Store, when a merchant posted a review, the following information was available:
- The store name, which was linked to the merchant’s Shopify domain.
- The rating
- The Date the review was posted
- The content of the review
Here is what the Spently App Page looked like:

Here is what the source code on the app page looked like for a single review:
<figure class="resourcesreviews-reviews-star" itemprop="review" itemscope="" itemtype="http://schema.org/Review" data-review_id="111293">
  <div class="contents">
  <span data-review-type="star" class="appcard-rating-star appcard-rating-star-5"></span>
  <blockquote itemprop="reviewBody"><p>Great app. Perfect for creating very professional receipts, cart recovery emails and other  automations!</p></blockquote>
  <figcaption>
      <strong><a rel="external" itemprop="author" href="https://web.archive.org/web/20170314230947/http://a njasnewtestshop.myshopify.com/">Anja's Test Shop</a></strong>
    <span class="review-datepublished">posted <time datetime="2017-02-21T16:22:39Z" data-local="time-ago" title="February 21, 2017 at 11:22am ">on Feb 21, 2017</time></span>
    <meta itemprop="datePublished" content="2017-02-21T11:22:39-05:00">
  </figcaption>
  <meta itemprop="reviewRating" content="5">
</div>
</figure>
(I used the wayback machine to access the markup since the new App Store was live when I wrote this blog. You can view the old App Store structure yourself here: Order Confirmation Emails for Ecommerce - Spently)
In order to find each reviewer and update them in Intercom, I needed to do the following:
- Find the reviewer’s Shopify domain
- Find the merchant in our database
- Send an Intercom API request to update the merchant with the tag
Reviewer
Step 1: Getting the .MyShopify Domain
Why do we need the Merchant’s Shopify Domain?
The most reliable way to associate a merchant with a review is to use their Shopify domain. Let me explain.
In the Shopify API, each merchant has an associated Shop resource.
The Shop resource has many properties but when dealing with reviews, we only have access to two of them:
name: the name of the shop, and it can be modified by the merchant.myshopify_domain: the shop’s myshopify.com domain. This value can never change.
Although the shop’s name is also available in the review, since it is subject to change, it is unreliable.
Using HTML Agility Pack, I could access the review content of each page like so:
var reviewNodes = reviewPage.SelectNodes(“//figure[@class=‘resourcesreviews-reviews-star’] //div[@class=‘contents’]”).ToList();To grab each reviewer’s Shopify domain, we needed to loop through each of the reviewNodes. Inside the for loop, I was able to grab the domain using the following code:
string domain = rev.SelectSingleNode(“.//a”).Attributes[“href”].Value;Step 2: Associating A Shopify Domain to a User
Spently uses the Shopify domain as a unique identifier for a merchant. Once we had the merchant’s Shopify domain, we could find them in our database.
Step 3: Update the Merchant in Intercom
We needed to get the merchant’s id in our database because it is associated with the merchant’s user_id in Intercom.
Once we had the merchant’s database record, we had all the information we needed to update Intercom.
We simply needed to make an API POST request to Intercom’s tag endpoint, supply the tag name (Reviewer) and pass an array of users to update (more info here: API & Webhooks Reference)
Here is what that looks like:
 JObject attrs = new JObject
                {
                    { "name", tag },
                    { "users", JArray.FromObject(new[] { new { user_id = companyId } }) }
                };
In the summer of 2018, Shopify released a new App Store, which changed the layout of the page and broke the web crawler. I was able to modify it to work with the new layout, however, the initial sync functionality would not have worked at that time. Thankfully, I had already completed the initial sync, and the crawler only had to scan over that day’s reviewers. I will be writing a blog post in the near future to detail how I grabbed each day's reviews.
Written by Anja Gusev who lives and works in Toronto building useful things. You should follow her on Twitter

